|
Tamaño: 224
Comentario:
|
Tamaño: 3619
Comentario:
|
| Los textos eliminados se marcan así. | Los textos añadidos se marcan así. |
| Línea 1: | Línea 1: |
| . . ||<tablewidth="200px"> {{attachment:Screenshot_debian8_2017-06-13_10_22_25.png||width="282",height="211"}} || || || {{attachment:Screenshot_debian8_2017-06-13_10_22_25.png||width="282",height="211"}} || || |
||<tablewidth="989px" tableheight="660px"> [[attachment:Screenshot_debian8_2017-06-13_10_22_25.png|{{attachment:Screenshot_debian8_2017-06-13_10_22_25.png||width="282",height="211"}}]] ||INICIO INSTALACION DEBIAN 8:Se seleciona la opción INSTALL y se presiona ENTER. || || [[attachment:ScreenShot2.png|{{attachment:ScreenShot2.png||width="282",height="211"}}]] ||Seleccionamos el idioma para istalar el sistema operativo. En este caso ESPAÑOL - SPANISH || || [[attachment:ScreenShot3.png|{{attachment:ScreenShot3.png||width="282",height="211"}}]] ||Seleccionamos el país para configurar la zona horaria. En este caso CHILE y presionamos ENTER.|| || [[attachment:ScreenShot4.png|{{attachment:ScreenShot4.png||width="282",height="211"}}]] ||Ahora se selecciona la configuración para nuestro teclado. LATINOAMERICANO y luego ENTER. || || [[attachment:ScreenShot5.png|{{attachment:ScreenShot5.png||width="282",height="211"}}]] ||Esperamos el proceso para descargar en instalar componentes adicionales. || || [[attachment:ScreenShot6.png|{{attachment:ScreenShot6.png||width="282",height="211"}}]] ||Configuramos el nombre de nuestra maquina.|| || [[attachment:ScreenShot7.png|{{attachment:ScreenShot7.png||width="282",height="211"}}]] ||Configuramos un nombre de dominio, en nuestro caso lo dejamos en blanco. || || [[attachment:ScreenShot8.png|{{attachment:ScreenShot8.png||width="282",height="211"}}]] ||Introducimos la clave de SUPERUSUARIO.|| || [[attachment:ScreenShot9.png|{{attachment:ScreenShot9.png||width="282",height="211"}}]] ||Volvemos a introducir la clave de SUPERUSUARIO para verificación. || || [[attachment:ScreenShot10.png|{{attachment:ScreenShot10.png||width="282",height="211"}}]] ||Ahora creamos un nombre de USUARIO. || || [[attachment:ScreenShot11.png|{{attachment:ScreenShot11.png||width="282",height="211"}}]] ||Y creamos y verificamos una CONTRASEÑA para luego ingresar al USUARIO anteriormente creado.|| || [[attachment:ScreenShot12.png|{{attachment:ScreenShot12.png||width="282",height="211"}}]] ||Escogemos una zona horaria || || [[attachment:ScreenShot13.png|{{attachment:ScreenShot13.png||width="282",height="211"}}]] ||INICIO INSTALACION DEBIAN 8 || || [[attachment:ScreenShot14.png|{{attachment:ScreenShot14.png||width="282",height="211"}}]] ||INICIO INSTALACION DEBIAN 8 || || [[attachment:ScreenShot15.png|{{attachment:ScreenShot15.png||width="282",height="211"}}]] ||INICIO INSTALACION DEBIAN 8 || || [[attachment:ScreenShot16.png|{{attachment:ScreenShot16.png||width="282",height="211"}}]] ||INICIO INSTALACION DEBIAN 8 || || [[attachment:ScreenShot17.png|{{attachment:ScreenShot17.png||width="282",height="211"}}]] ||INICIO INSTALACION DEBIAN 8 || || [[attachment:ScreenShot18.png|{{attachment:ScreenShot18.png||width="282",height="211"}}]] ||INICIO INSTALACION DEBIAN 8 || || [[attachment:ScreenShot19.png|{{attachment:ScreenShot19.png||width="282",height="211"}}]] ||INICIO INSTALACION DEBIAN 8 || || [[attachment:ScreenShot20.png|{{attachment:ScreenShot20.png||width="282",height="211"}}]] ||INICIO INSTALACION DEBIAN 8 || || [[attachment:ScreenShot21.png|{{attachment:ScreenShot21.png||width="282",height="211"}}]] ||INICIO INSTALACION DEBIAN 8 || || [[attachment:ScreenShot22.png|{{attachment:ScreenShot22.png||width="282",height="211"}}]] ||INICIO INSTALACION DEBIAN 8 || || [[attachment:ScreenShot23.png|{{attachment:ScreenShot23.png||width="282",height="211"}}]] ||INICIO INSTALACION DEBIAN 8 || || [[attachment:ScreenShot24.png|{{attachment:ScreenShot24.png||width="282",height="211"}}]] ||INICIO INSTALACION DEBIAN 8 || |
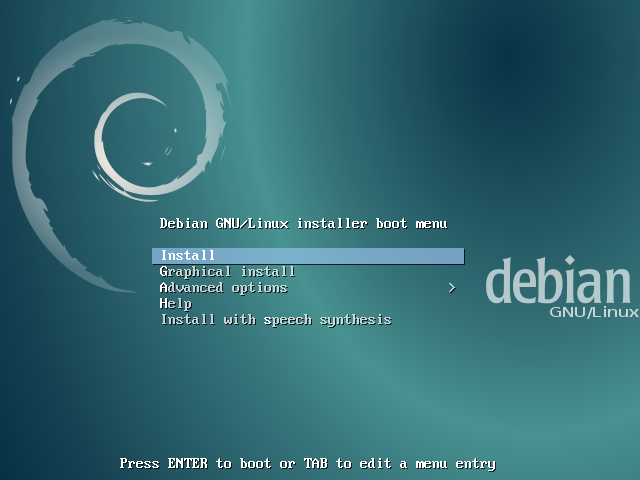
INICIO INSTALACION DEBIAN 8:Se seleciona la opción INSTALL y se presiona ENTER. |
|
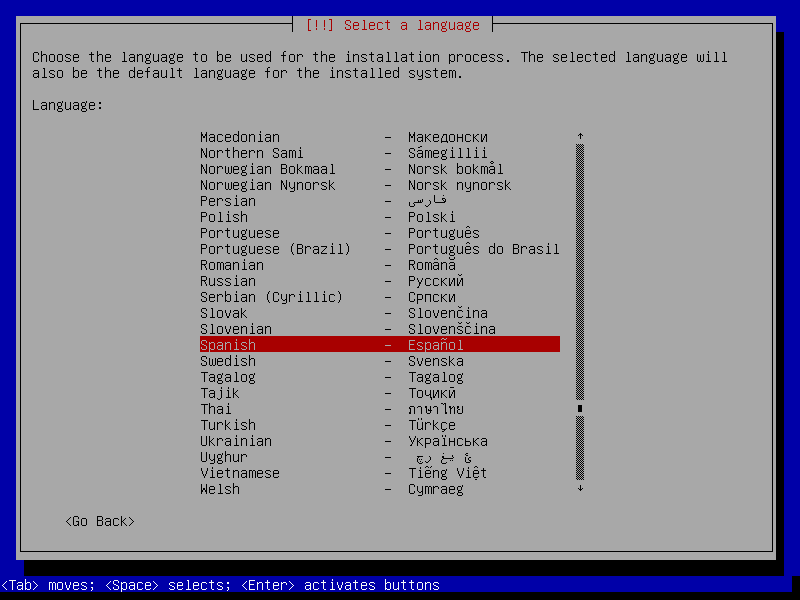
Seleccionamos el idioma para istalar el sistema operativo. En este caso ESPAÑOL - SPANISH |
|
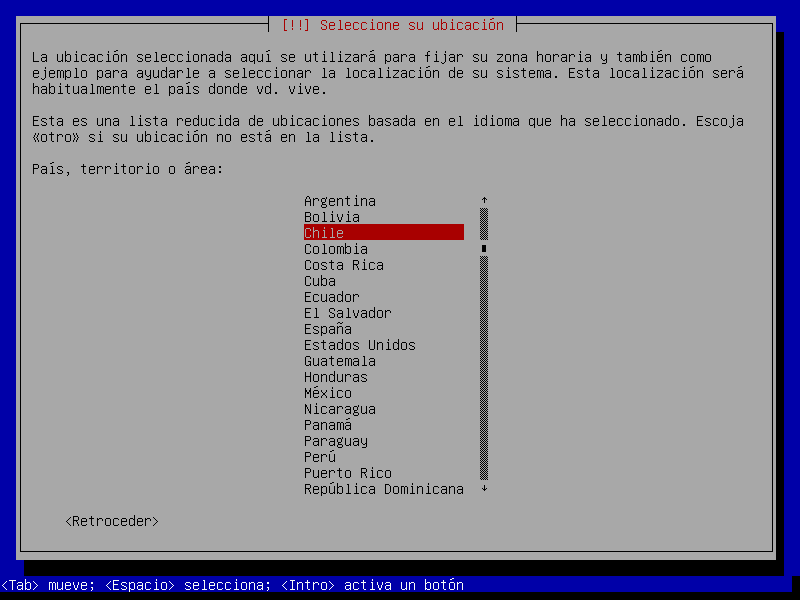
Seleccionamos el país para configurar la zona horaria. En este caso CHILE y presionamos ENTER. |
|
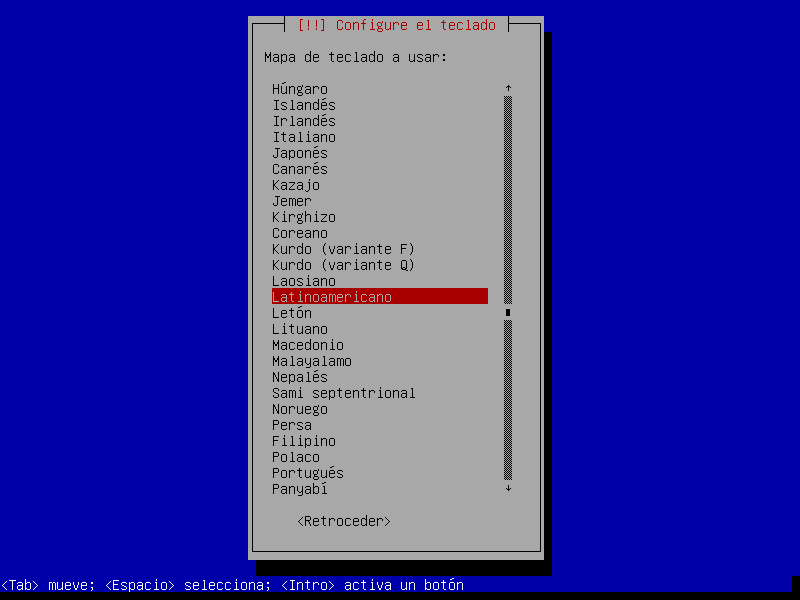
Ahora se selecciona la configuración para nuestro teclado. LATINOAMERICANO y luego ENTER. |
|
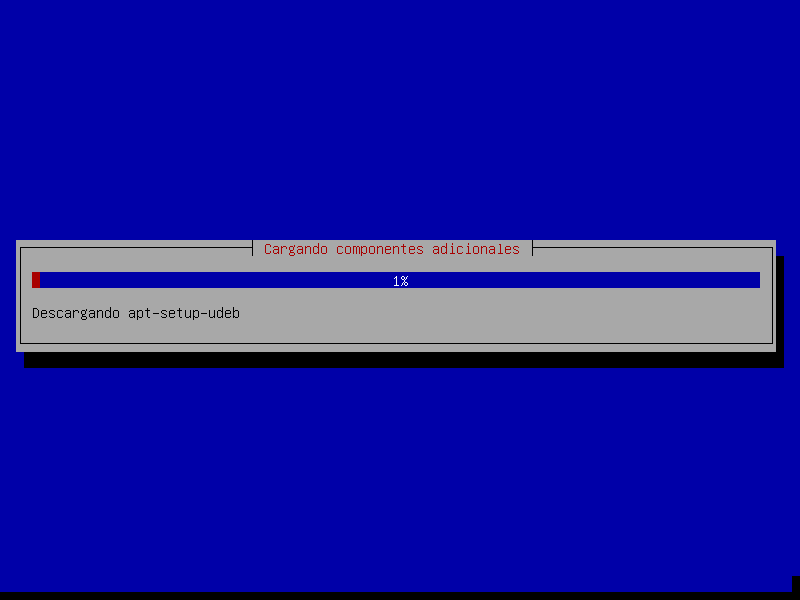
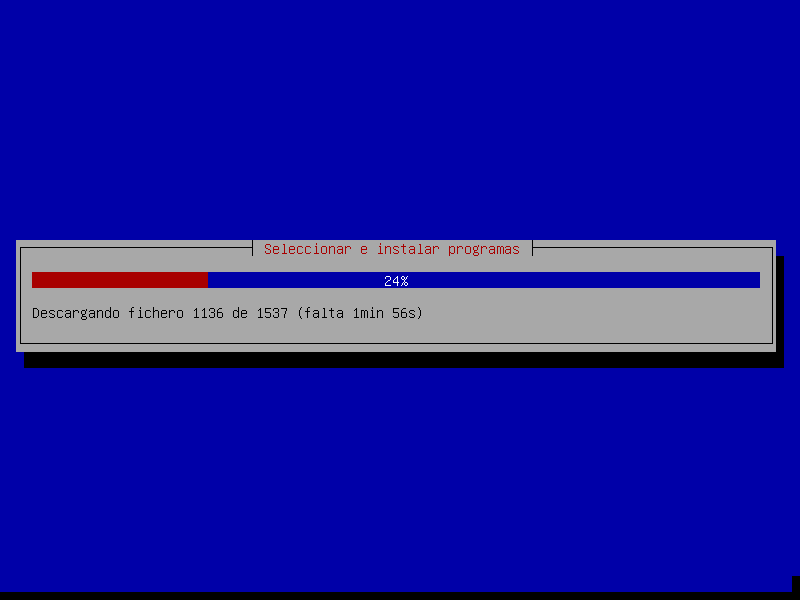
Esperamos el proceso para descargar en instalar componentes adicionales. |
|
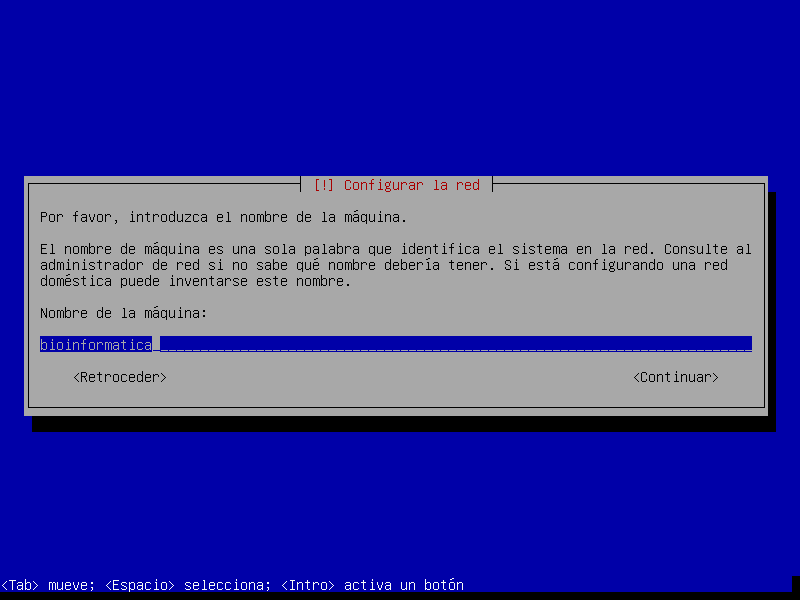
Configuramos el nombre de nuestra maquina. |
|
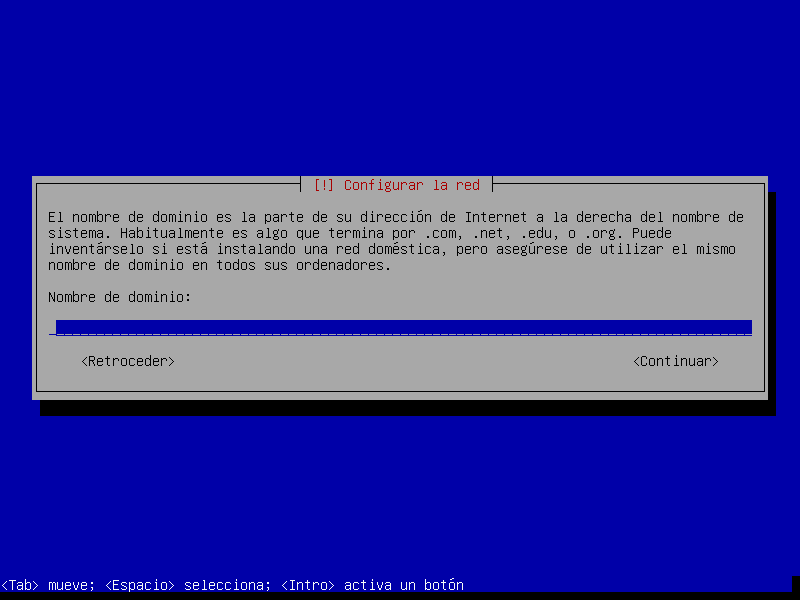
Configuramos un nombre de dominio, en nuestro caso lo dejamos en blanco. |
|
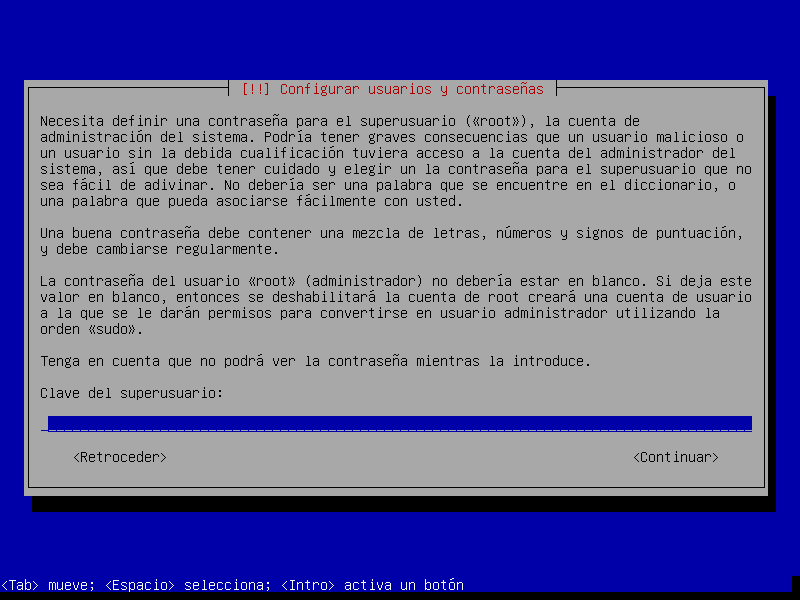
Introducimos la clave de SUPERUSUARIO. |
|
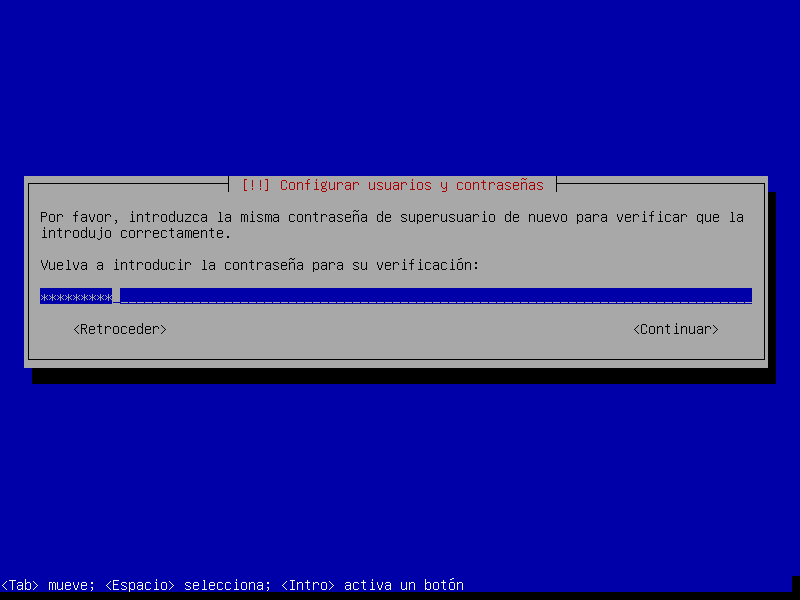
Volvemos a introducir la clave de SUPERUSUARIO para verificación. |
|
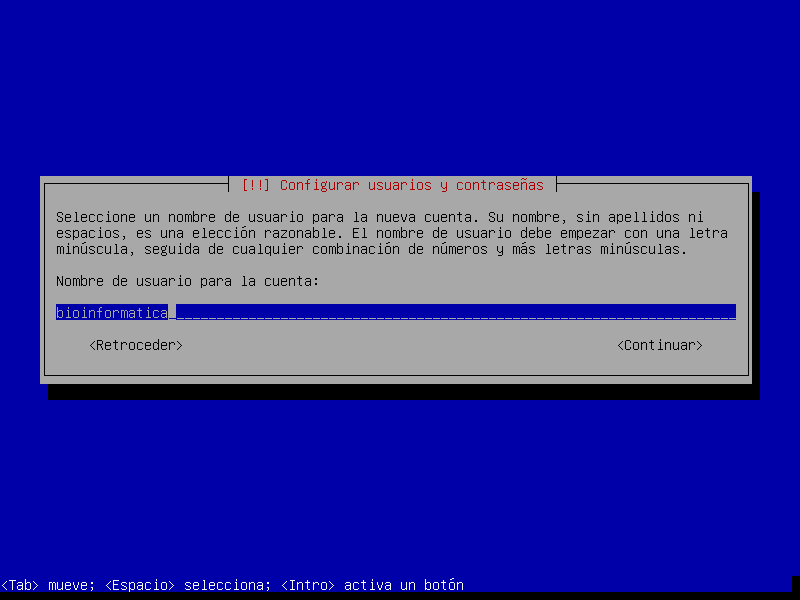
Ahora creamos un nombre de USUARIO. |
|
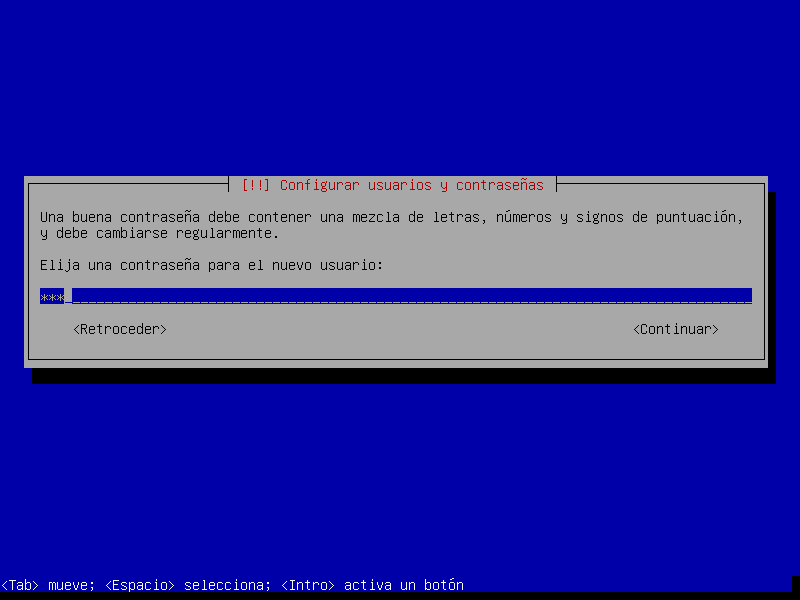
Y creamos y verificamos una CONTRASEÑA para luego ingresar al USUARIO anteriormente creado. |
|
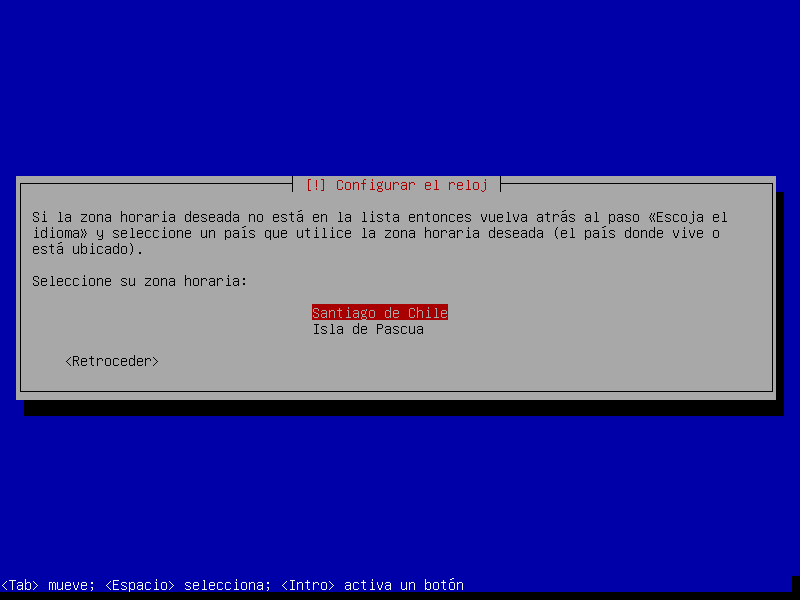
Escogemos una zona horaria |
|
INICIO INSTALACION DEBIAN 8 |
|
INICIO INSTALACION DEBIAN 8 |
|
INICIO INSTALACION DEBIAN 8 |
|
INICIO INSTALACION DEBIAN 8 |
|
INICIO INSTALACION DEBIAN 8 |
|
INICIO INSTALACION DEBIAN 8 |
|
INICIO INSTALACION DEBIAN 8 |
|
INICIO INSTALACION DEBIAN 8 |
|
INICIO INSTALACION DEBIAN 8 |
|
INICIO INSTALACION DEBIAN 8 |
|
INICIO INSTALACION DEBIAN 8 |
|
INICIO INSTALACION DEBIAN 8 |

